First Activities On Your First Linux Computer
Just like with any brand new tech, there are some setup things to be done. Here's a good checklist for that first couple activities on your new (or newly installed) Linux computer.


So you've either followed my instructions to install Linux on your own computer, or you've purchased a new Linux computer. Either way, congratulations, you're on a path of owning your own privacy and cybersecurity, and that's fantastic. But now, we have some setup to do, and some items to become familiar with.
For this post we'll use Linux Mint 21 as our example OS. This is the OS used in the sibling post to this one Installing Linux For the First Time, and has some excellent features to call out in the process. If you have a different Linux installed don't worry, while the actual commands and programs may differ, the features should be there for you to use as well, you just may have to do some of your own research to find them and to find how to configure them.
The Basics
As soon as you log in you will get to the desktop. In the lower left of your screen, much like Windows 10, you'll see the Linux Mint button. that opens the primary menu where you can access all your programs and settings. The column on the left includes shortcuts to often used items, the middle column includes categories of apps, and the right are the apps in that category. The search box at the top is your friend for finding apps as well. Additionally your options to lock the screen, log out, and shut down are there on the left.
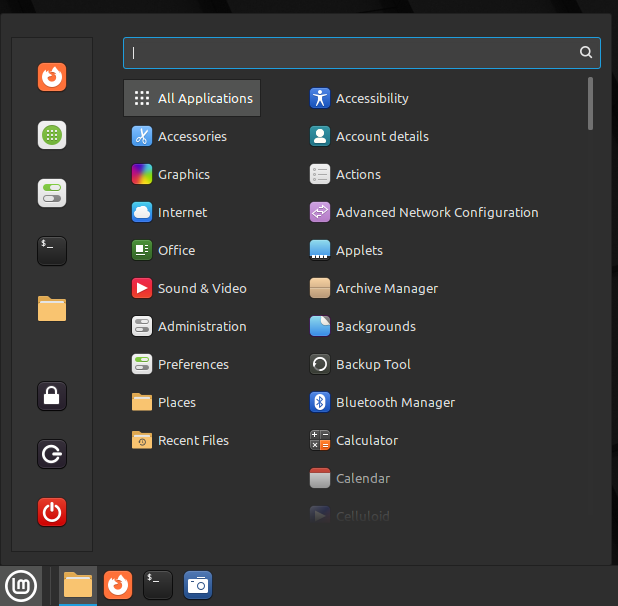
The panel below, that dark gray strip across the bottom of the screen, is where you can pin applications, and where open apps, folders, etc. will show. At the far right of that panel are your clock, and some key system resources, like Bluetooth, network, sound, printers, power, and the clock.
Completing Your Setup
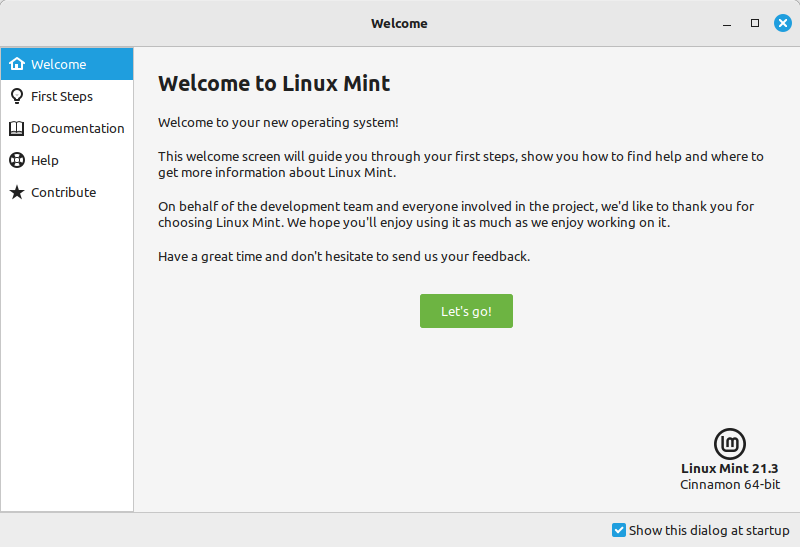
Just because the OS is installed doesn't mean there aren't a few more things to do. Mint is kind enough to provide you this welcome screen, and I encourage you to look through each of the tabs, as there are links and suggestions for good resources. But before we start using those, let's focus on the "First Steps" tab.

Timeshift/System Snapshots
I'll skip over Desktop Colors for now, since you can figure that one out for yourself, and let's start with the next item in the list, System Snapshots. Clicking the Launch button will get you into the configuration utility for automated backups.
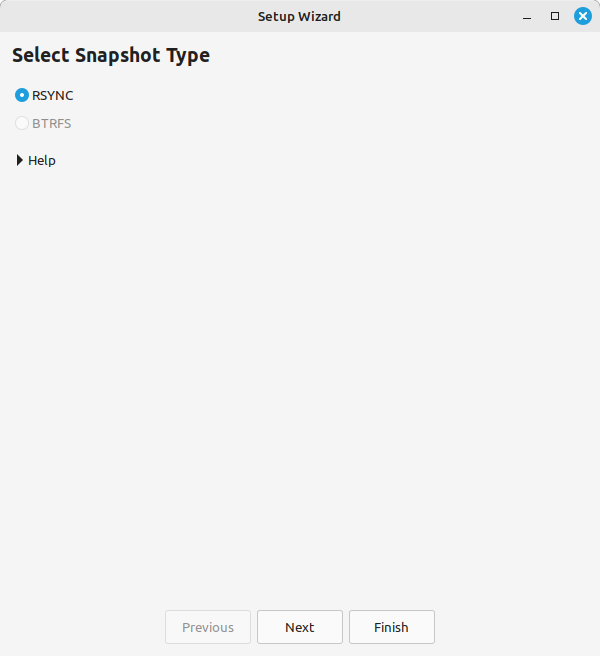
Not much to do here unless you've made some interesting decisions during the install that we haven't covered, so hit Next to continue.
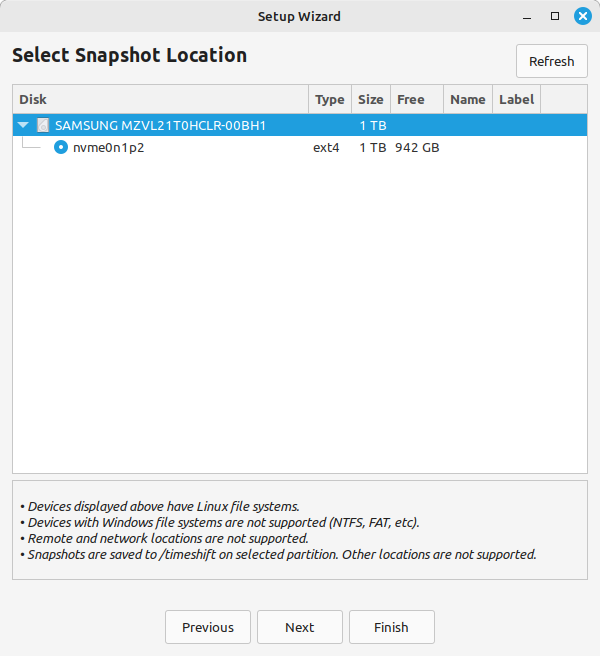
The second page hasn't much more to do, except to choose the partition on your hard disk to save backups to. Again, we could have made some advanced decisions in the install, but for us just pick the partition option (it's actually the second item in the list, the first is the physical drive itself) and hit Next.
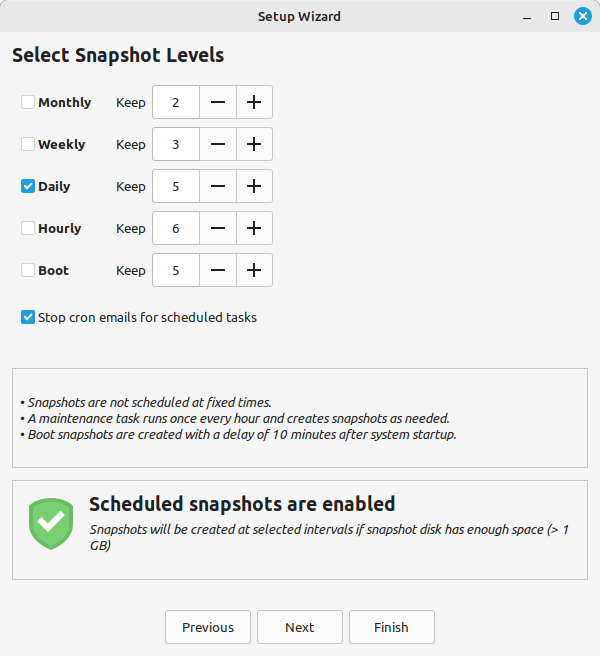
This third page asks us how often we want to do backups and how many of them we want to keep. The default is 5 daily backups, which is pretty good for the primary purpose of these snapshots - backing out of updates or changes that didn't work right.
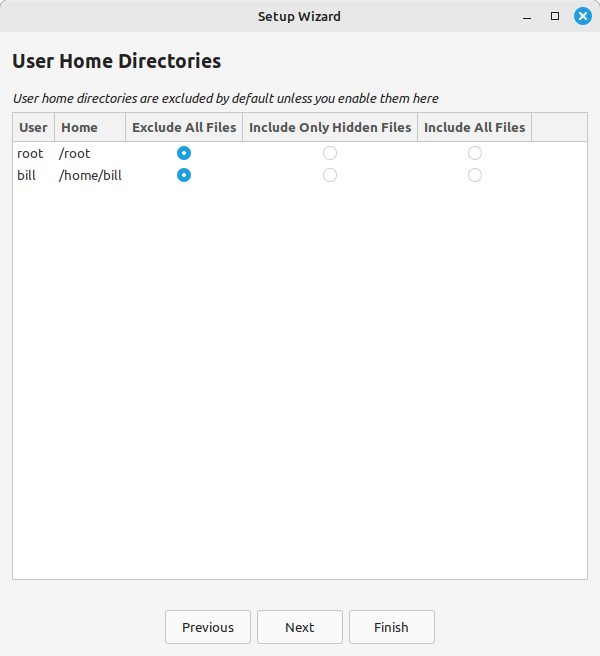
Your home directory doesn't really store anything critical to the computer actually working or not. It stores your files (pictures, documents, etc.) and your preferences (what color scheme, font sizes, etc.). Backing up the home directories tends to really increase the size of the backup. I'd recommend you have a NAS, cloud backup, or a thumb-drive that you routinely copy your important files to. But these are the other options available to you:
- Include Only Hidden Files - this means that, primarily, your configuration and settings files in your home directory will be backed up. This is a good choice for making sure your preferences for the system and apps are backed up, without taking up space with all your pictures, movies, audio files, etc. If you're going to backup your home directory/ies via this solution, this would be my recommendation.
- Include All Files - choose this one if you want to back all your files up from your home directory, but remember that this backup is on the same hard drive as your actual files - that limits the value of this choice significantly.
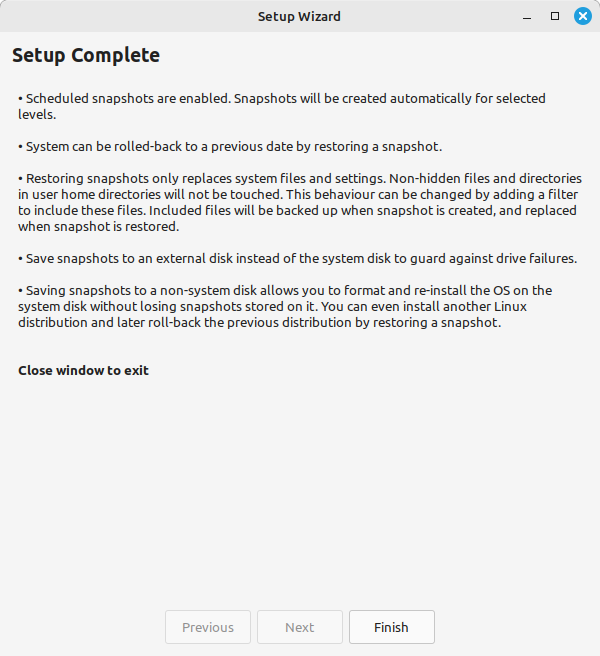
Congrats, this is set up. Hit Finish, and you'll go to the main window for Timeshift.
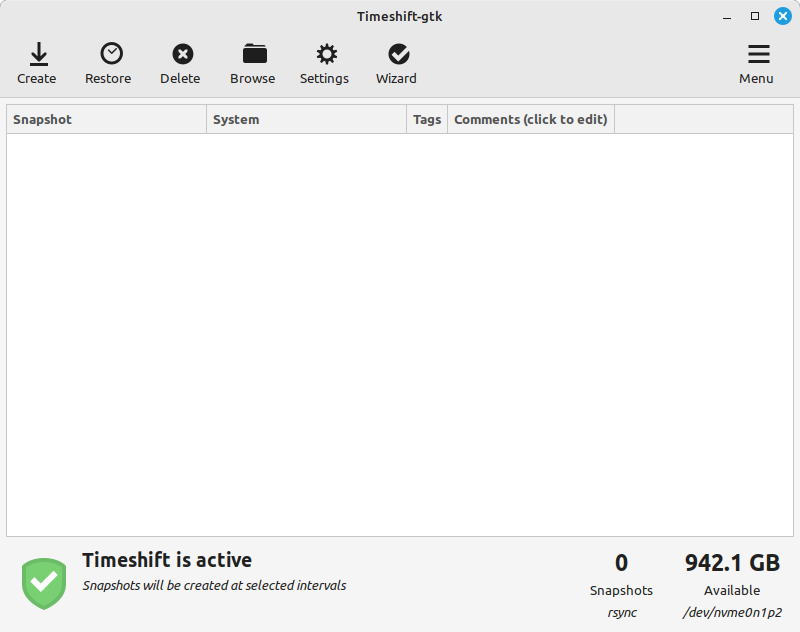
Backups will show up in this window, and from here you can restore to any of them, or you can also force a backup to be made if you're about to do surgery you're unsure of. Close this window when you're ready to move on.
Driver Manager
Some hardware just doesn't have any open-source drivers that are part of the Linux ecosystem. Others have open-source drivers, but the proprietary drivers from the manufacturer are also available. Driver Manager (don't forget to hit the launch button) is where we configure whether or not we want to use those proprietary drivers.
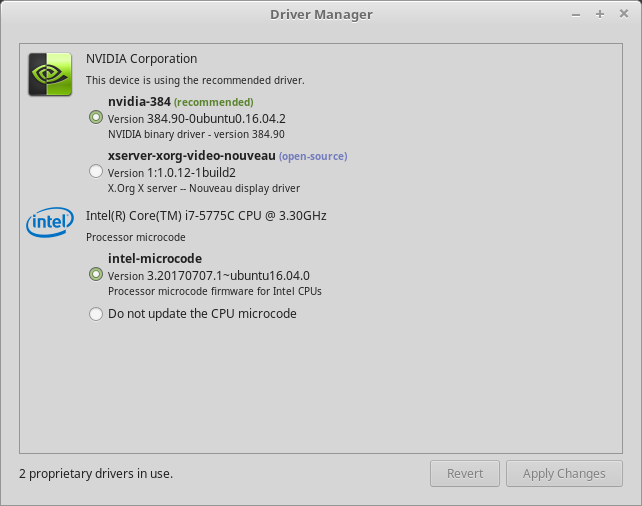
Two general rules for this tool:
- Accept the "recommended" driver whenever one is identified. In this case, that's the NVIDIA proprietary drivers, not the open-source drivers.
- Microcode and processor-focused drivers should generally be updated as well.
Making changes to the settings in this app will likely require your password and a reboot. You may also need to go through the process of enrolling a key in your BIOS for Secure Boot purposes, as we had to do during the installation process. This is absolutely work the effort.
Reboot as needed, or close this window if there's nothing you need to change - it is common that you won't have anything in this window at all.
Update Manager
This app will be your best friend for a lot of things. Please, hit the "Launch" button.
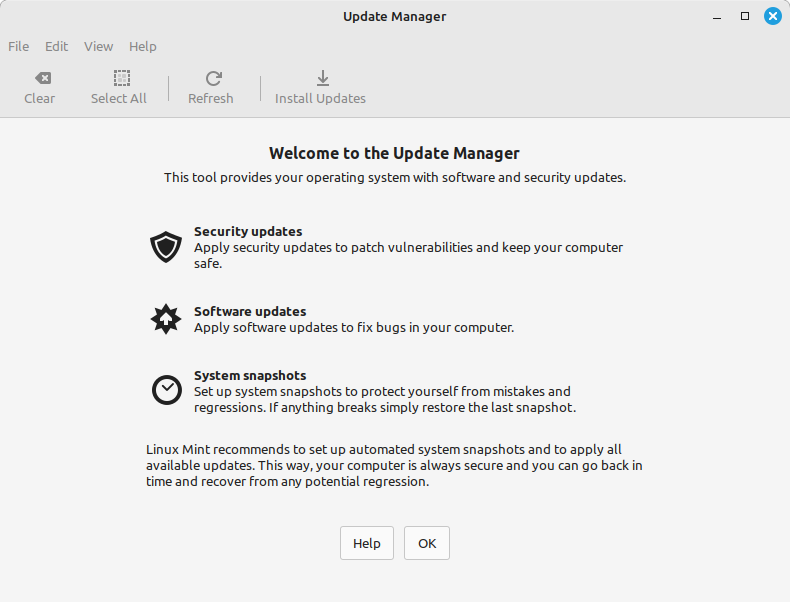
Here, you've been greeted with sage advice. Read it and hit OK.
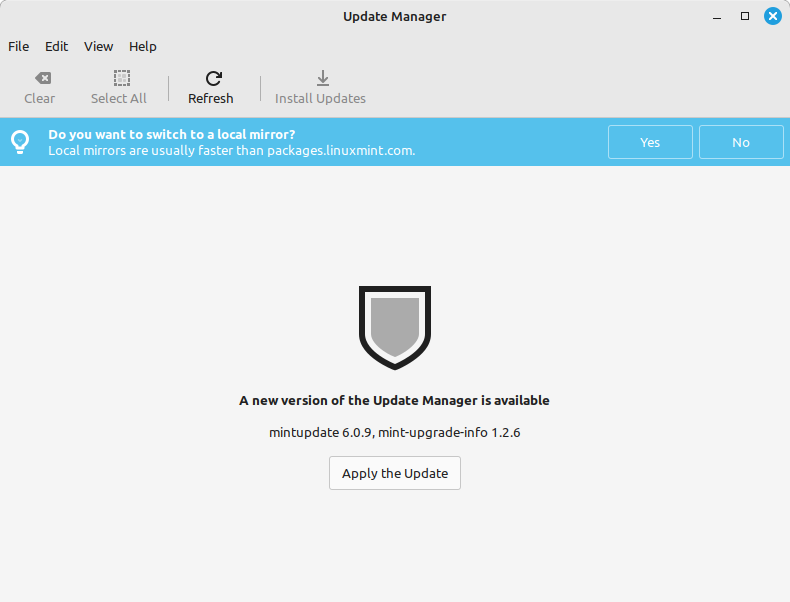
From time to time you will be asked to specifically update the update manager. Whenever you see this message you should choose "Apply the Update." Do so now if asked, and then let's choose "Yes" to set local mirrors.
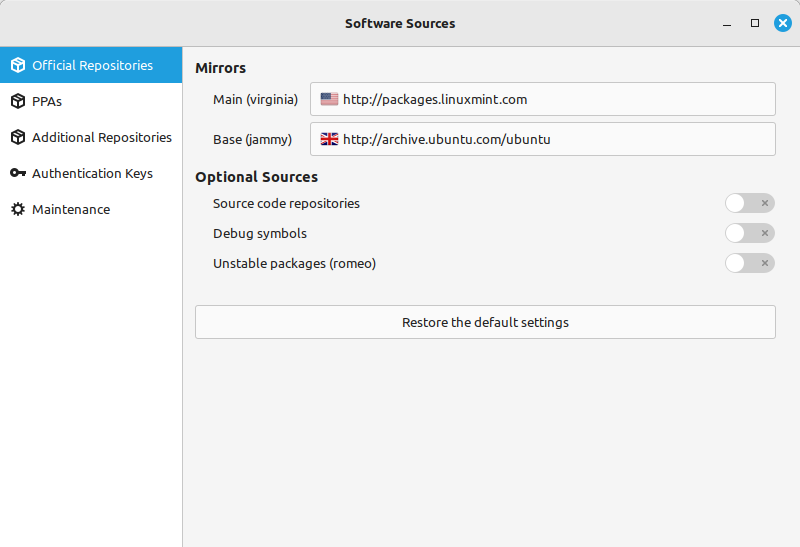
When choosing local mirrors, you want to at least set the first two properly. When you click in the box for either of them you'll get a list of sites that will orient themselves in order of connection bandwidth/speed, which will take a few moments.
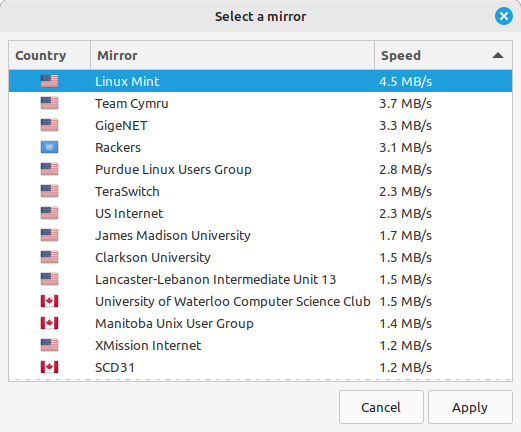
Choose whatever mirror comes up as the highest speed for you, assuming you're setting this up from home. If you're not where the computer will be used most of the time, at least choose sources in your own country for best performance. Save your choices, and agree to refresh information, then close the "Software Sources" window. You should see something like this:
Before installing all these updates, let's go to the Edit menu, and choose Preferences. Go to the 3rd tab, Automation.
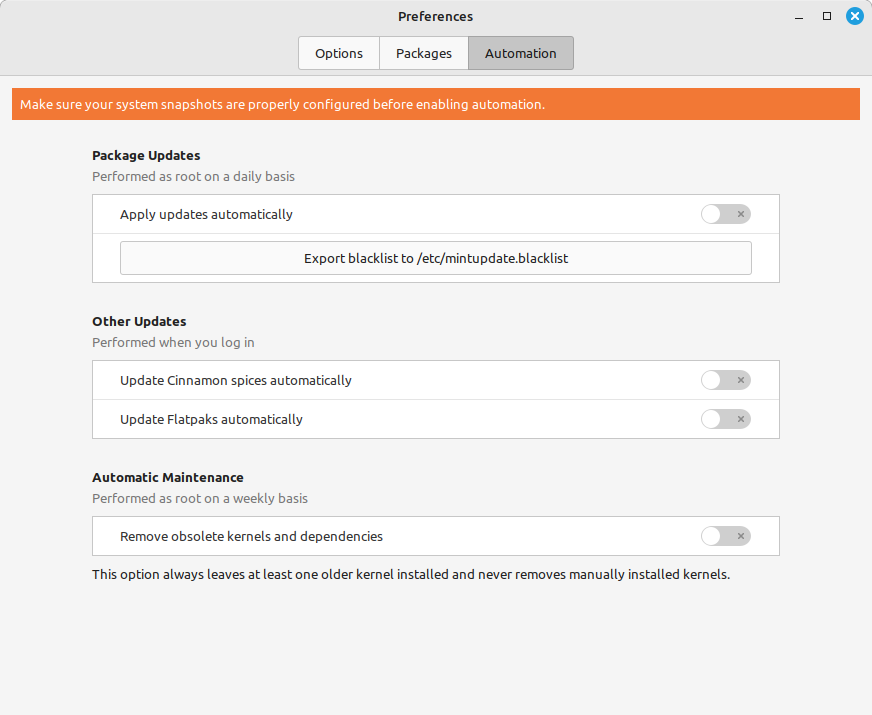
Since we've already set up Timeshift, we should be bold and check all 4 buttons to the on position (they're off in the image) and then close the Preferences window. This means that we can let the system update itself most of the time.
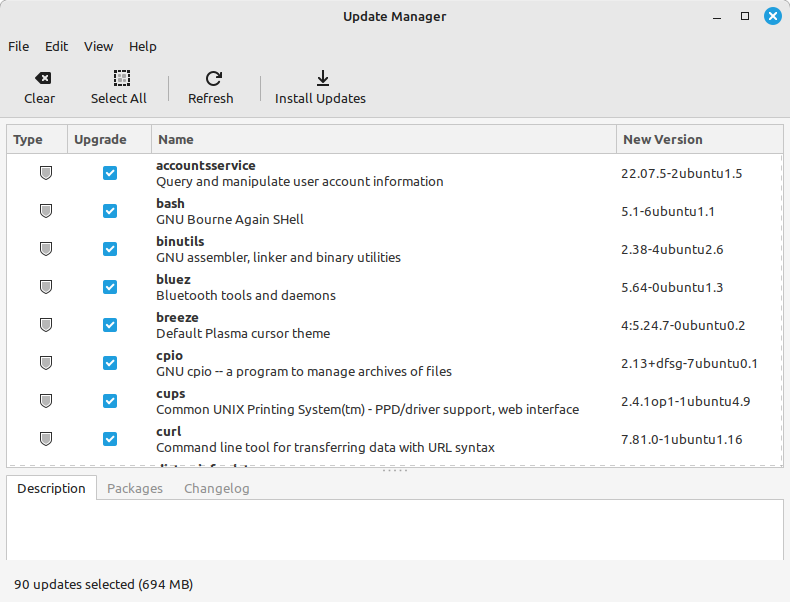
Back at the main screen where we have all those updates to install, choose the Install Updates option. After authenticating, you may see an alert like this:
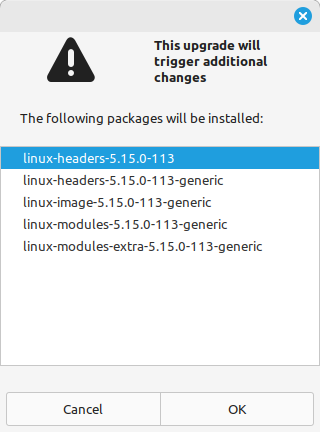
These are a list of dependencies that need to also be installed in order to support the packages listed to be installed. This is an over-abundance of information, they want you to know why these new packages are being installed even though you didn't specifically ask for them. Hit OK, and after a short while you should get the main window for Update Manager to return with no more updates to be installed. Close the window.
If you like installing updates yourself, Check for an orange dot on the Update Manager icon in the lower right of your screen like this:

That's your indication there are updates to install. Double click that icon and start updating!
Firewall
We fault Microsoft sometimes for over-automating or making too many assumptions about how you want your computer set up. Well, Linux often fails to the other extreme - leaving things for you to do yourself that you might otherwise want to assume are taken care of. The firewall is a great example of this. Find it in the First Steps menu and hit launch. (Yes, we're skipping System Settings and Software Manager for now)
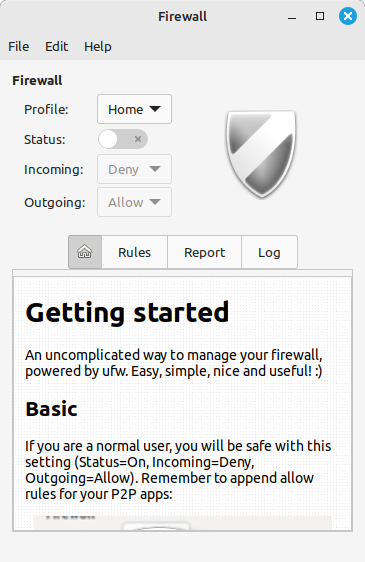

Before and After: Subtle but important differences.
We're going into this app primarily to set that Status slider to "on." That's it. The default rules for Home will mean that your computer accepts no inbound connections and it will allow all outbound traffic. Further modifications to allow particular inbound, or block outbound traffic are advanced topics for another day. Close the window once you've made sure you've enabled the firewall.
You now have a reasonably secure, ready to go Linux computer. You could stop here and feel proud of yourself, but you probably want to customize this computer a bit, and why wouldn't you?
Further Customization
System Settings
Going back to the "First Steps" menu, go ahead and launch the System Settings app.
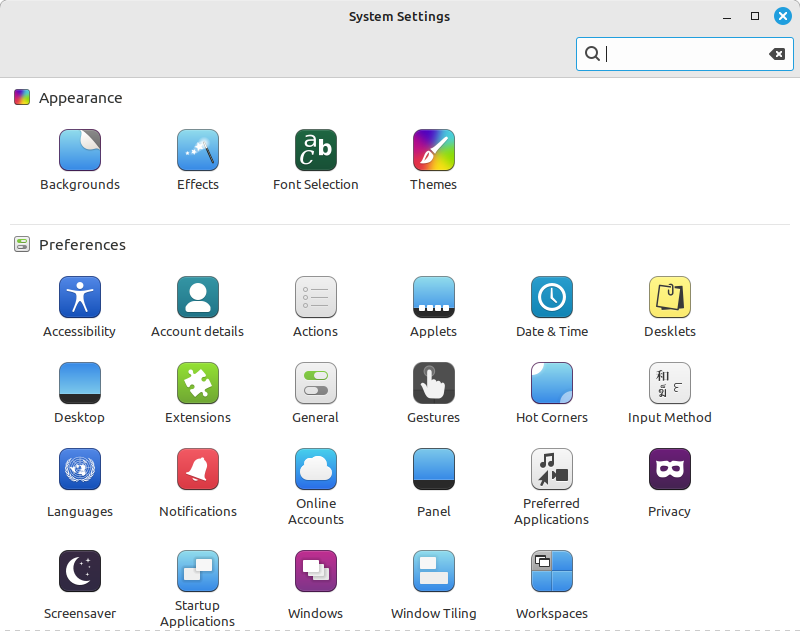
Scrolling up and down through this app you quickly see it is an umbrella for settings ranging from color choices to Device Manager and all points in between. Nothing needs to be done here at this time, but there are certainly some things you may wish to adjust. Bluetooth settings are one of those you might want to make sure are set up. Or perhaps turn off tap-to-click on your touch-pad because you keep moving the cursor without realizing it. (You may need to scroll down in the window to see that setting.) Close the window when you're done.
Software Manager
What good is an operating system if you can't run important software on it? Well, here's where you can browse a huge library of available software options. Go ahead and launch it.
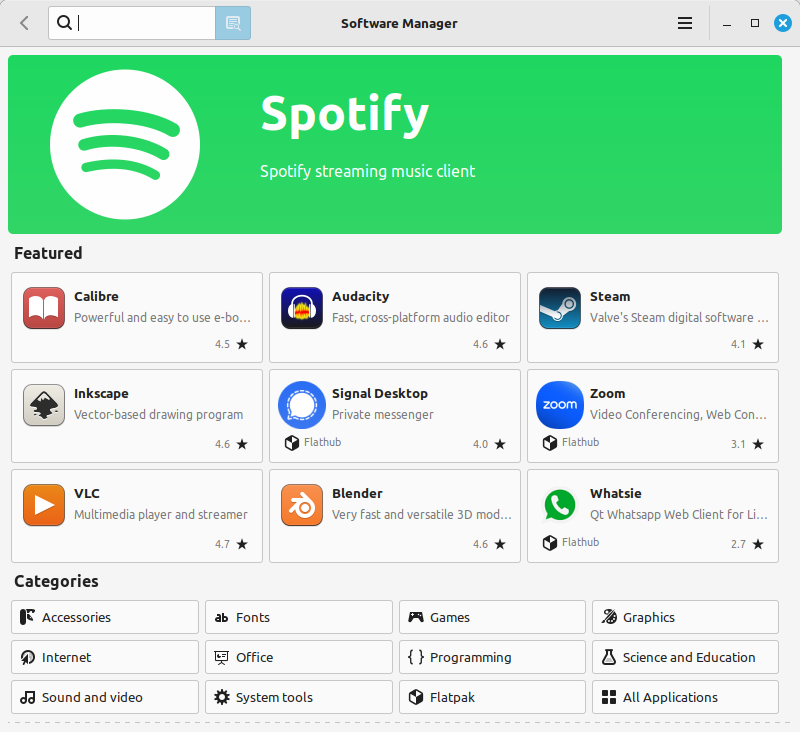
This is your best first stop for finding software you might want to use, though not the only one. There are plenty of other options you'll discover as you get more into Linux. The search box in the upper left is helpful, but browsing by category or through the featured options is great too. Choosing a piece of software will get you a screen like this:
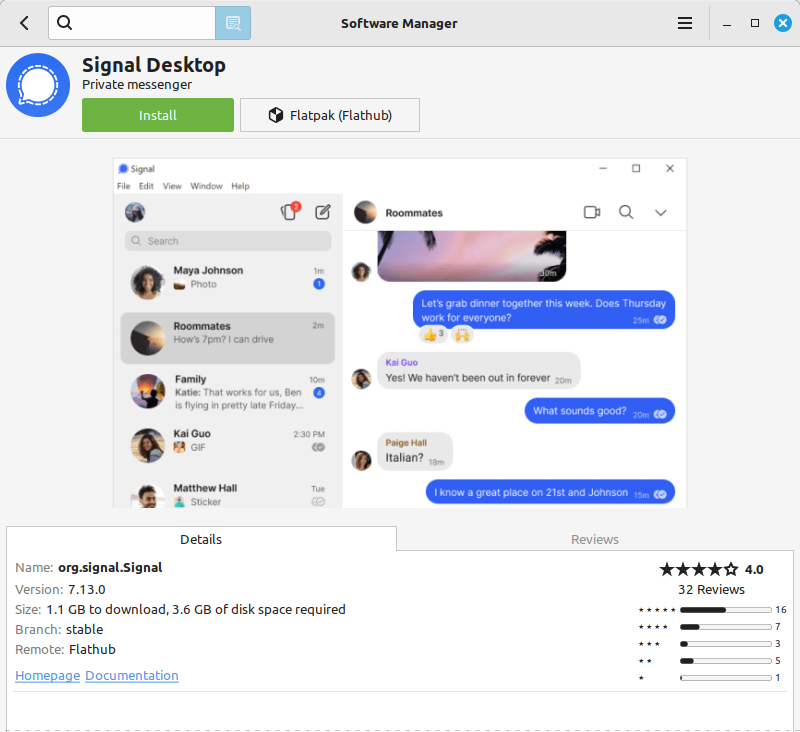
You'll see the obvious "install" button, beckoning you to install some software. If you like what you see, feel free. You can always uninstall from the same interface. Once installed, just like in Windows, the app will appear in the start window. Close this window when you're done as well.
Accessing These Features Later
Everything we've adjusted is available to adjust again in your menu. By the way, several of these are in the shortcuts column of the start menu, did you notice them?

Congratulations!
You have a living, breathing, Linux computer ready to help you take on the world. What will you do? Browse the web? Write the next Dune? Zoom with your coworkers? Hit the leader-boards in your favorite game? Stream some music? Watch some movies? Change the world? Or just check your email?
The choices are yours. But you've literally now done something less than 5% of the world's computing population has ever done. Bravo! Go brag about this to your friends.